

How to Create a Bot
Create a trading bot in RelayDesk. Pick a signal, broker and trade size, then set exits, trading hours and risk limits. Start in paper before going live.
A bot places and manages trades for you. It listens to one signal and opens a position when that signal fires. It then manages the trade with the sizing, exits, schedule and risk limits you set. We recommend new bots start in paper trading, so you can see how it behaves before it trades real money.
Before you start, connect at least one broker under Settings > Brokers. You need a broker connection to create and activate a bot.
Open the bot builder
Go to Bots in the top menu and click + New bot.
The Bots page lists every bot in your account. Use Yours to see the bots you built and Provided to see bots from RelayDesk or your community. Provided bots don't count toward your plan.
Choose what the bot trades
At the top of the builder, under What should this bot trade?, choose Options or Stocks & ETFs. Choose carefully, because you can't change the asset class after you create the bot. Your choice decides which brokers, signals, sizing, sessions and exits the builder shows.
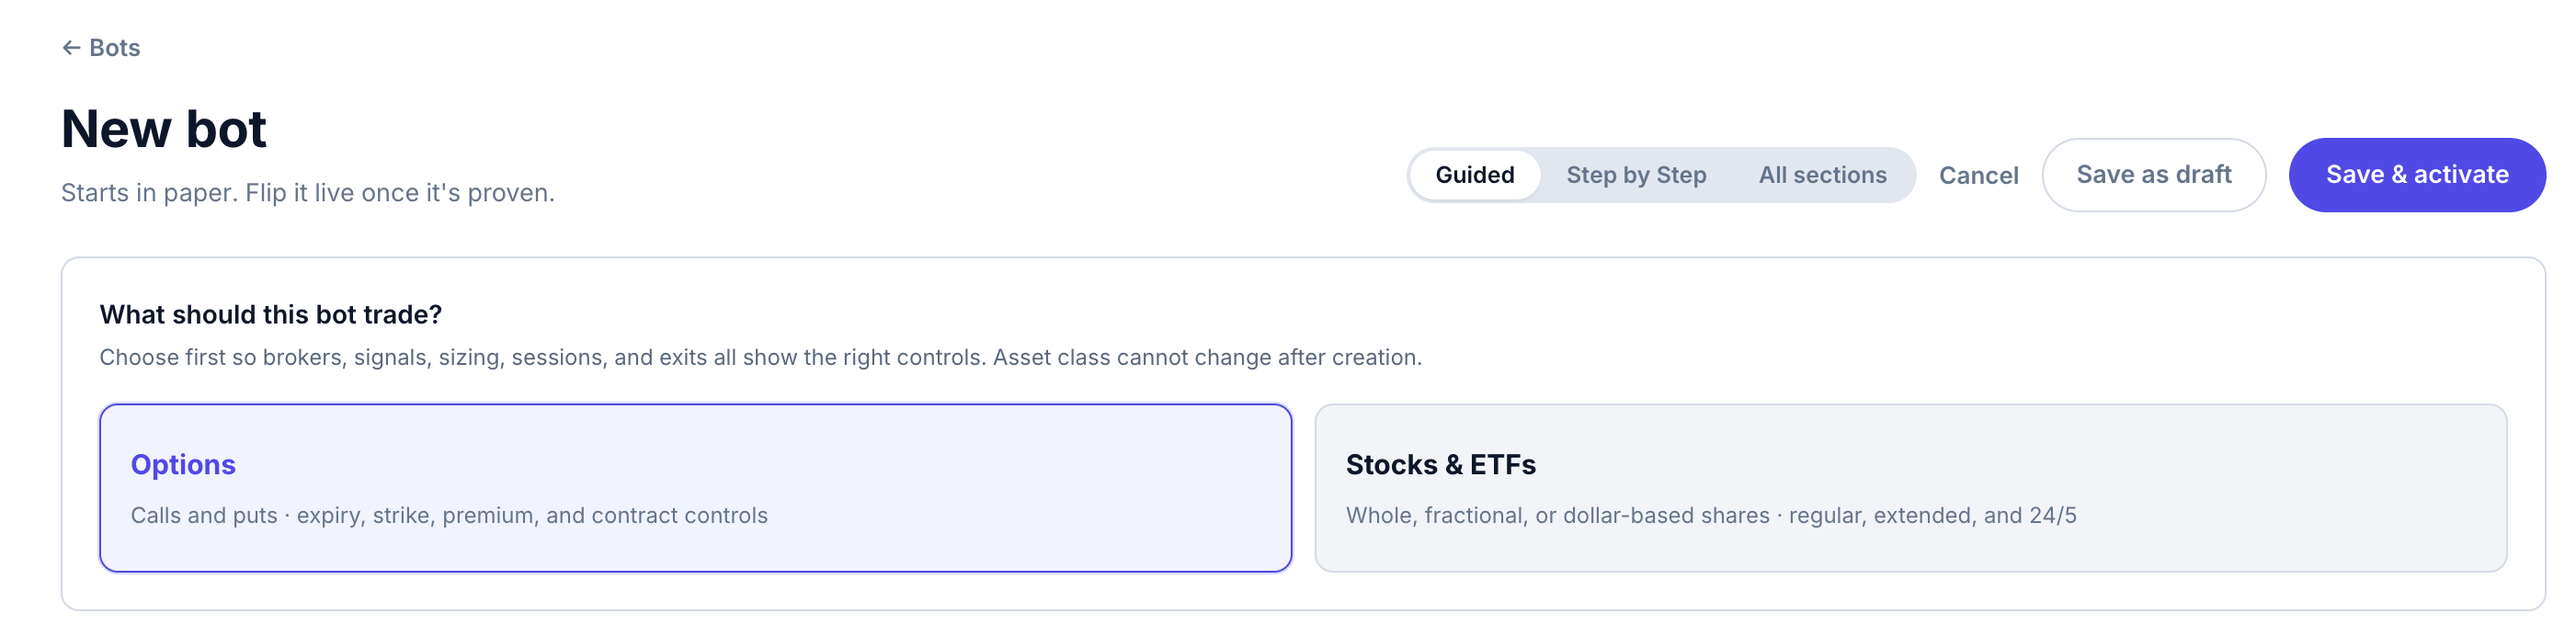
This guide covers Options bots. Stocks & ETFs bots trade whole, fractional or dollar-based shares, and can trade regular, extended or 24/5 sessions.
Pick a builder view
Use the switch in the top right to choose how you work through the builder. You can switch views as you go.
- Guided asks four questions: the bot's name, the signal, the broker account and how much to spend per trade. Default settings cover everything else. This is the quickest way to get a first bot running on paper.
- Step by Step walks you through each section in order, one screen at a time. Click Continue to move on, or click any step at the top to jump to it. Completed steps show a check mark.
- All sections shows every section on one page, which is useful when you're editing a bot you know well.
The rest of this guide follows the seven steps in Step by Step: six setup sections and a final review.
Step 1: Basics
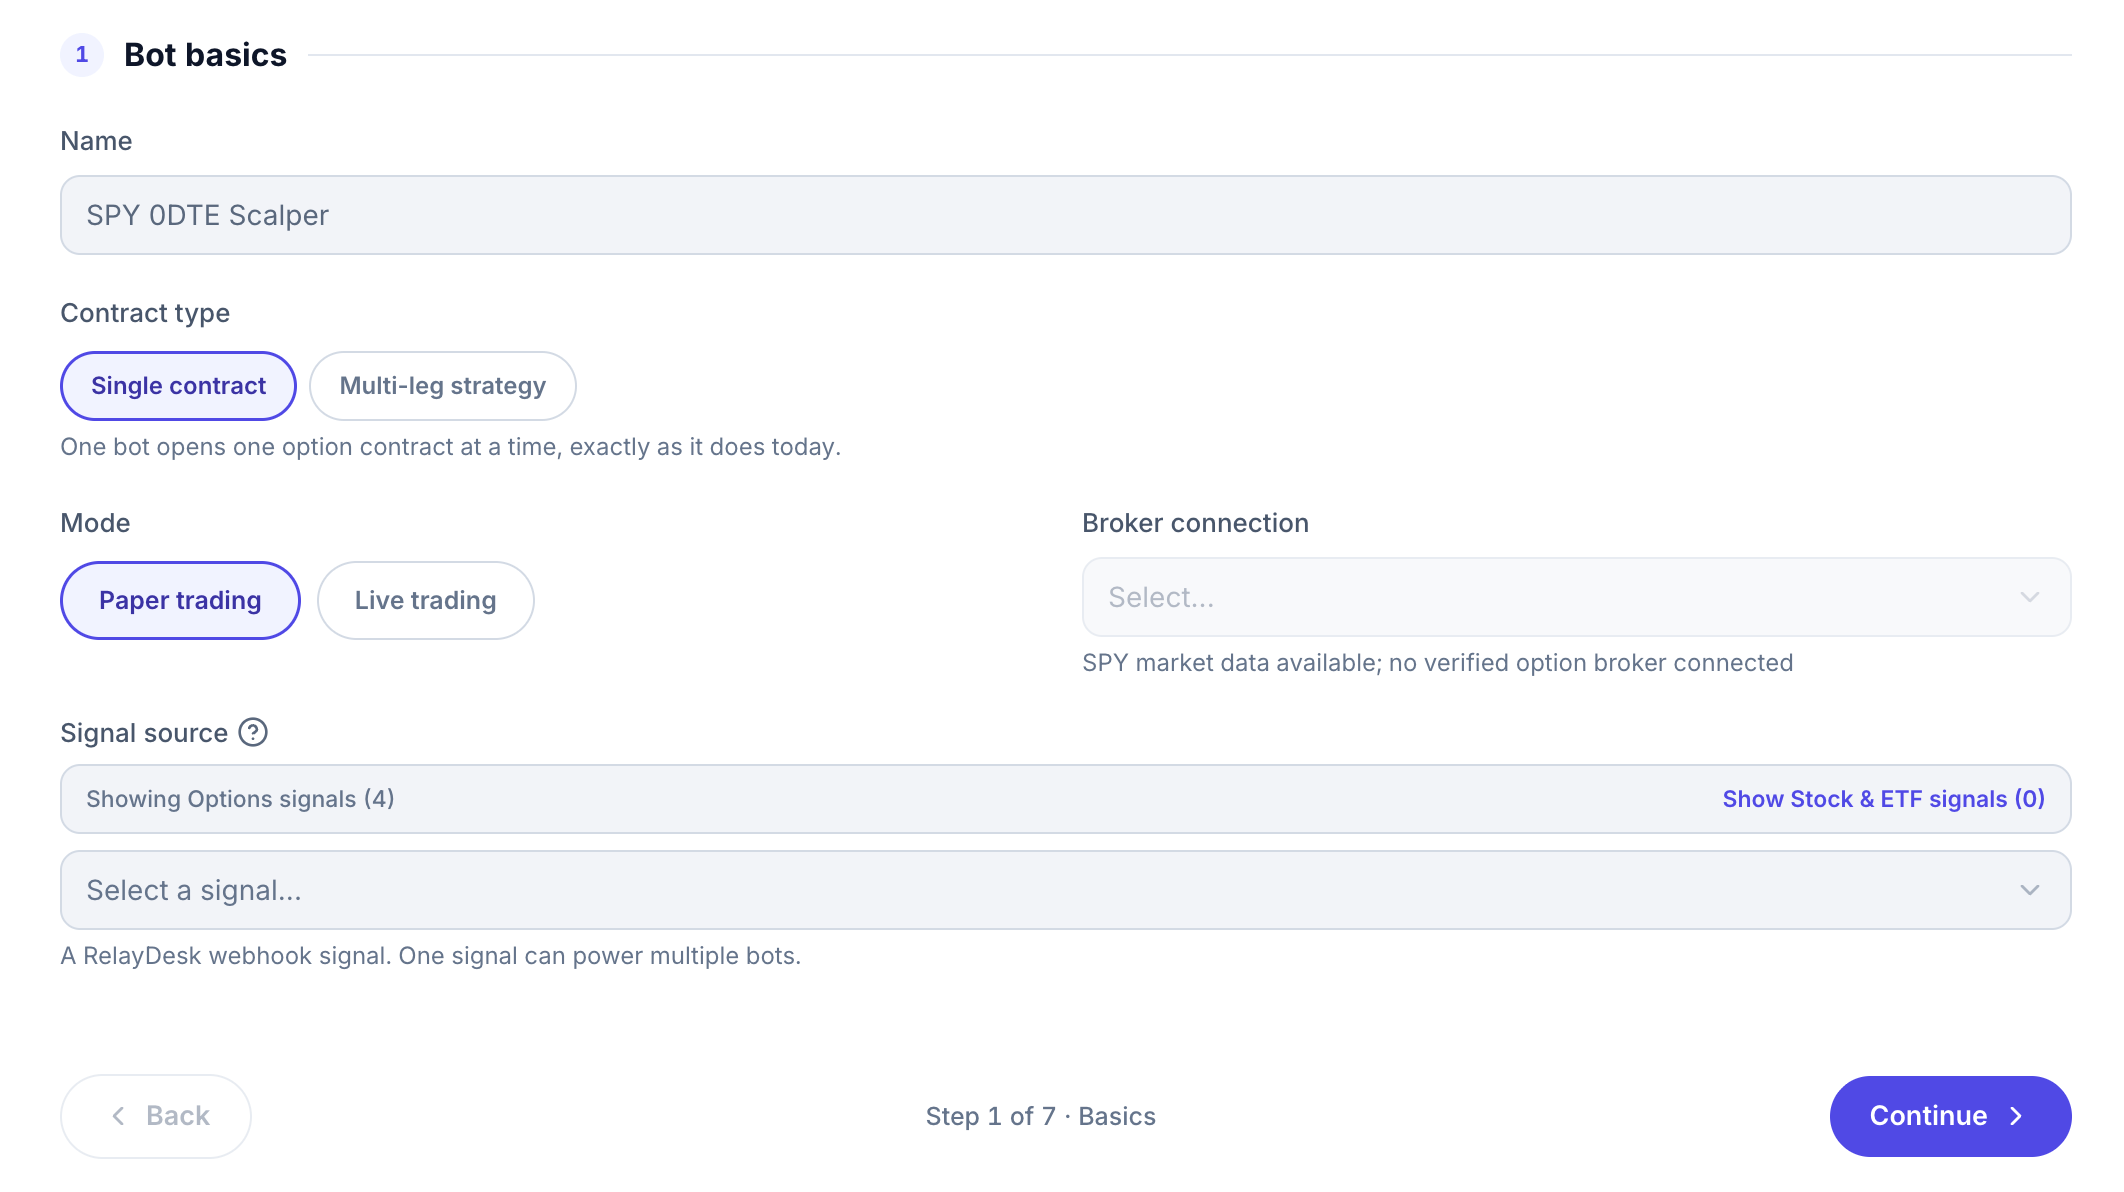
- Name. Use a short name you'll recognize in trades and notifications, such as "SPY 0DTE Scalper".
- Contract type. Choose Single contract or Multi-leg strategy.
- Mode. Choose Paper trading or Live trading. New bots start in paper. Paper trading sends real orders to your broker's paper account, using simulated money. Live trading uses real money in your live account.
- Broker connection. Choose which connected broker account the bot trades in. For paper trading, pick an account that supports paper, such as an Alpaca paper account. Tradier and Public connections are live only.
- Signal source. Choose the signal that fires the bot's entries. The list only shows signals that match the asset class you chose, and one signal can power many bots. If you joined through a partner community, its signals are already in the list. If you don't see the signal you want, create one in Signals first.
Step 2: Strategy
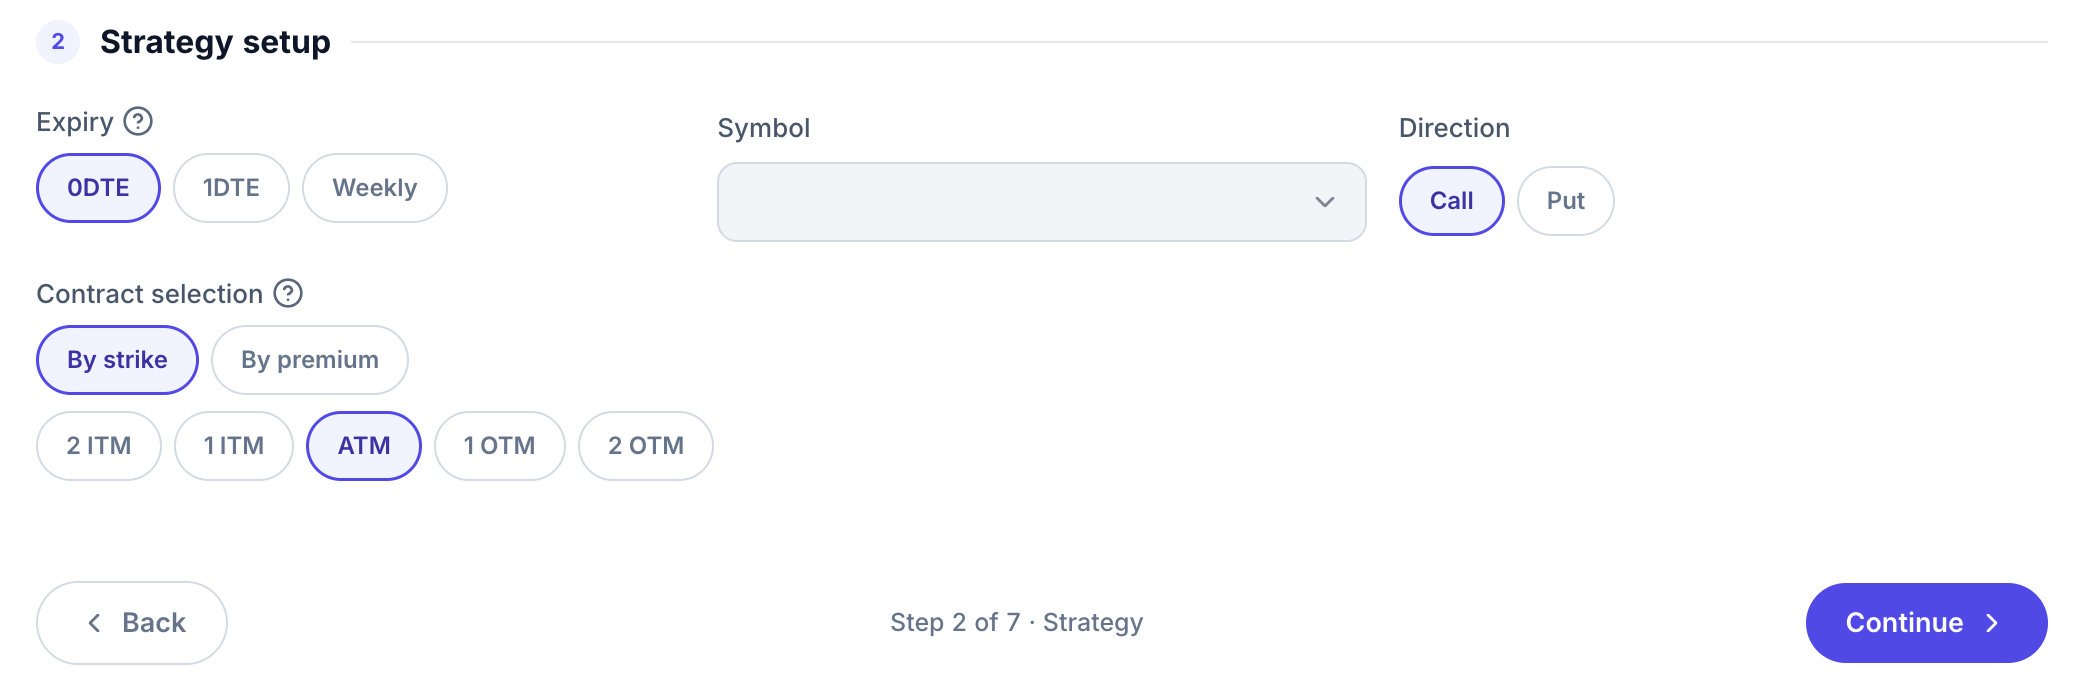
Strategy sets which contract the bot buys when the signal fires.
- Expiry. 0DTE trades options that expire the same day. 1DTE and Weekly give a position more time.
- Symbol. The underlying ticker, such as SPY or QQQ. Make sure it matches what your signal sends.
- Direction. Choose Call or Put. If your signal sets its own direction, the signal's setting takes priority.
- Contract selection. By strike picks a strike relative to the current price: 2 ITM, 1 ITM, ATM, 1 OTM or 2 OTM. In-the-money contracts cost more and move more closely with the stock. Out-of-the-money contracts cost less and are more likely to expire worthless. By premium picks a contract by its price instead.
Step 3: Sizing
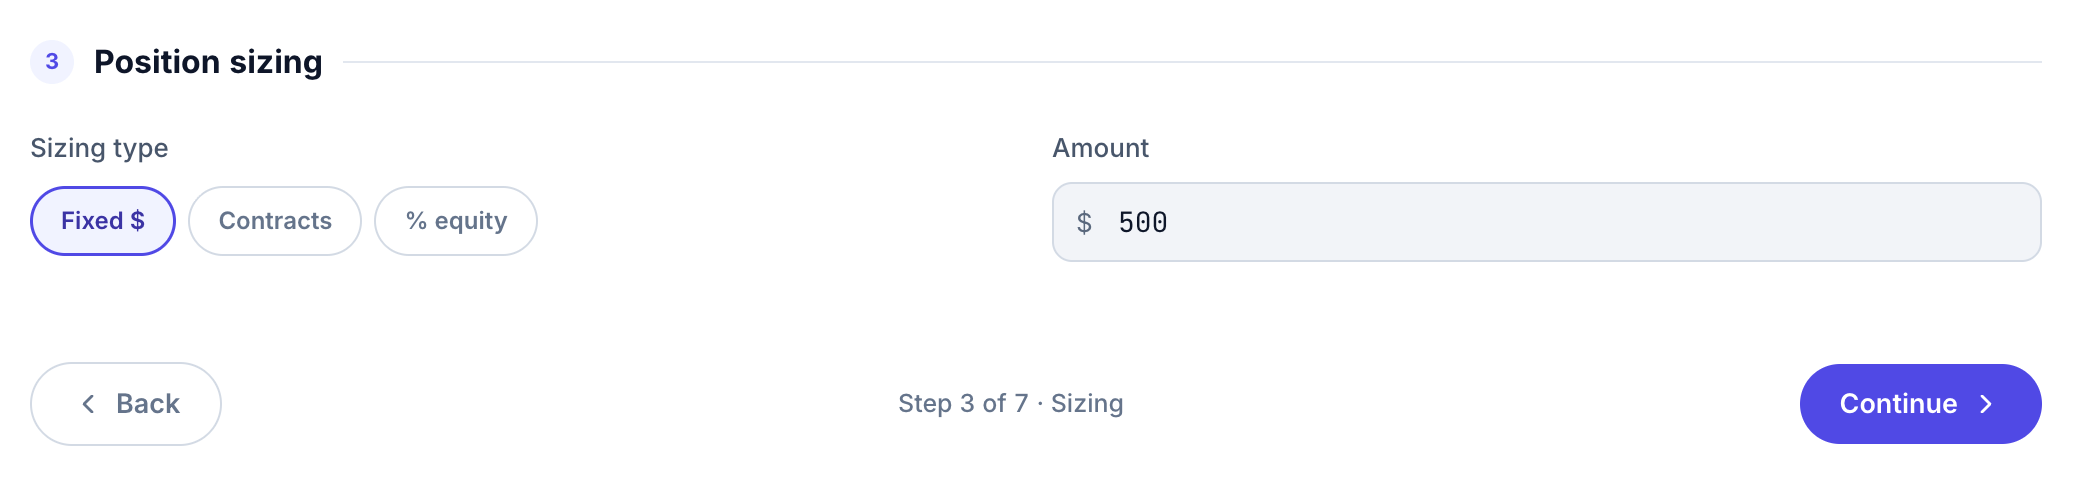
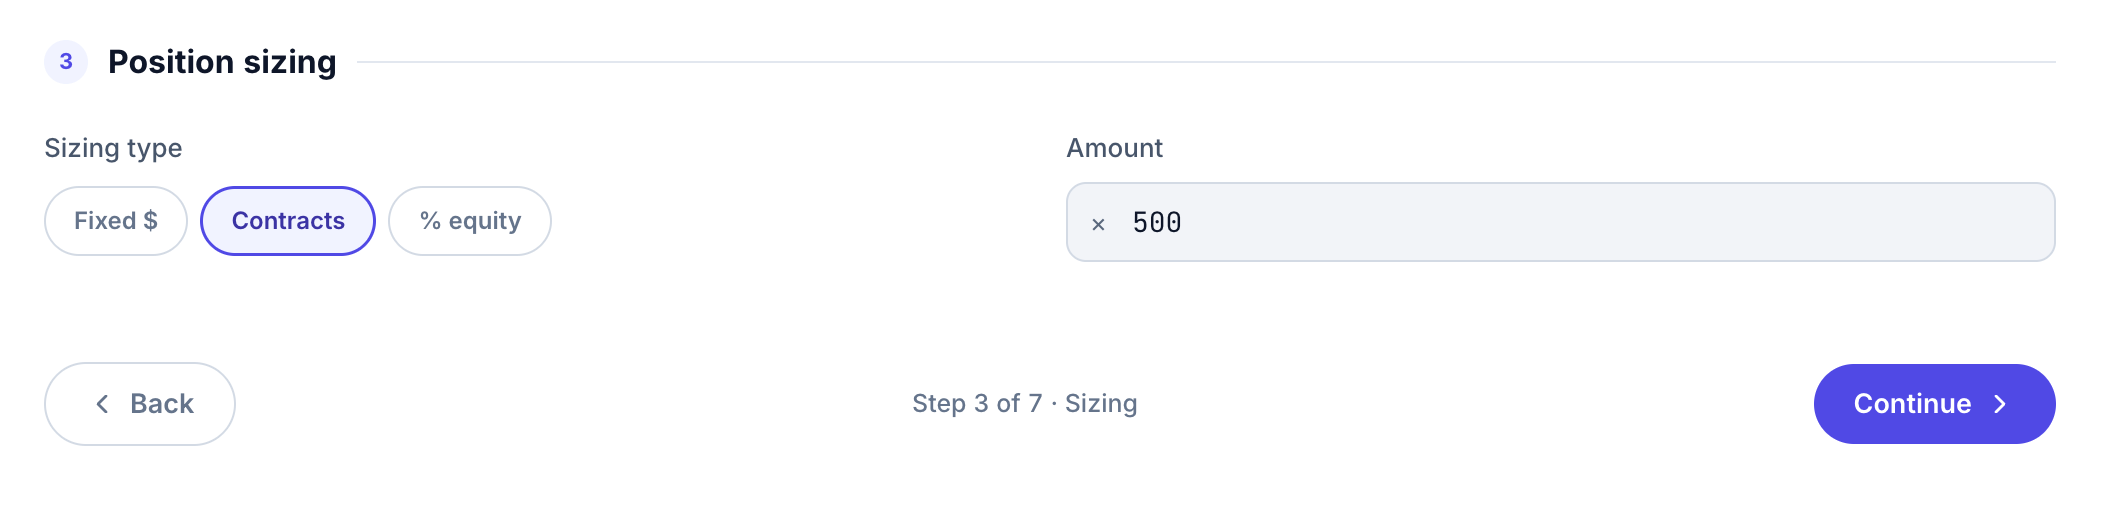
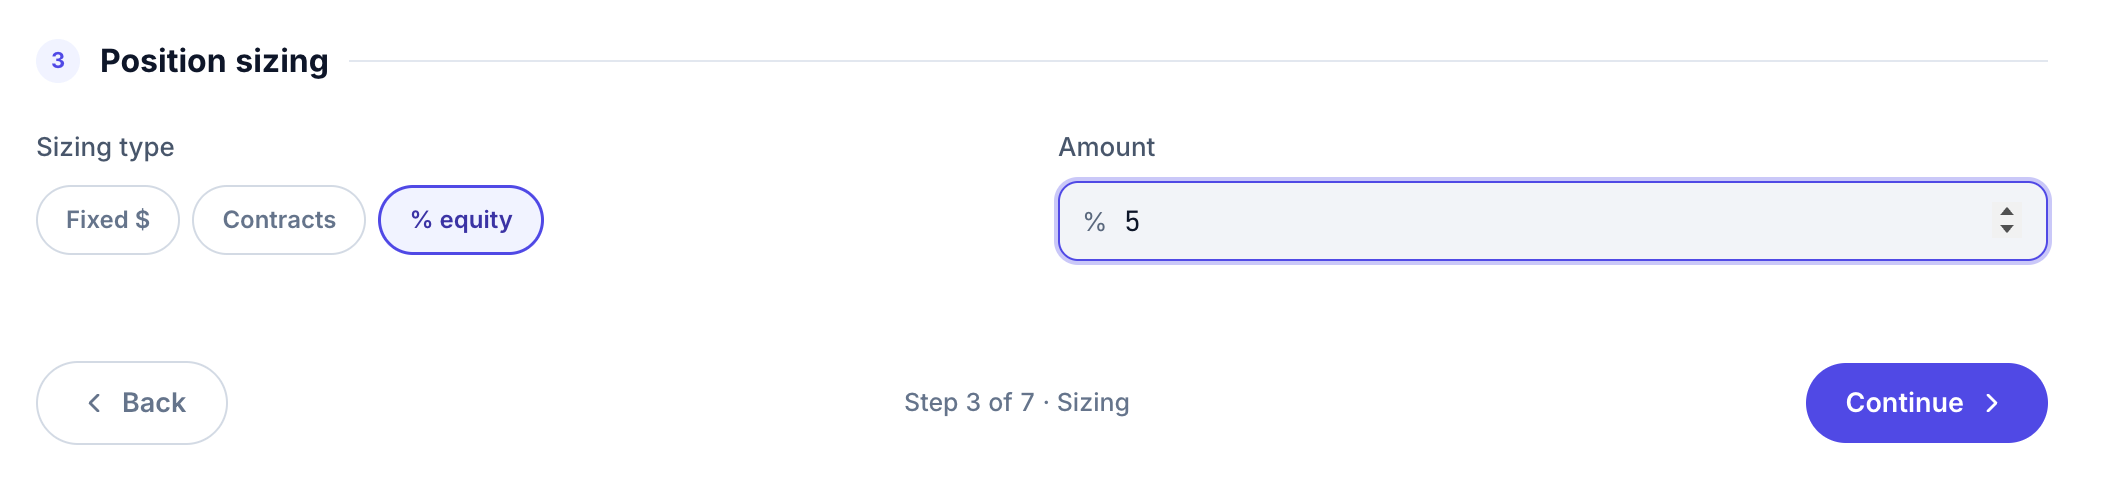
Sizing sets how much the bot spends on each entry. Under Sizing type, choose one of three options:
- Fixed $ spends the same dollar amount on every trade.
- Contracts buys the same number of contracts every time.
- % equity spends a percentage of your account value, so trade size changes as your account grows or shrinks.
Enter the value under Amount. In Guided, the builder suggests $500 as a conservative starting point.
Step 4: Exits
Exits decide when a position closes. Start by choosing an Exit mode:
- Auto-managed: RelayDesk watches price and exits at your take-profit (TP) and stop-loss (SL) targets.
- Signal-managed: your signal fires the exits, and your stop loss stays on as a safety net.
- Merged: exits from your signal and your RelayDesk targets are both active, and the first valid exit wins.
Set your targets. Under Your exit plan, start from a preset (Quick profits, Balanced or Let it run). The chart and the summary line below it show where each target and your stop sit, and what that means in dollars on your trade size. Adjust the numbers under Fine-tune the numbers. Each TP level has a Profit % and a Close %, the share of the position to close at that level. Use + Add TP Level for more levels, and keep Total allocation at 100%.
You can set targets as % gain or $ per contract, and close amounts as % position or Contracts. Closing an exact number of contracts requires Contracts sizing in Step 3.
Set your stop loss. Enter how far below entry to exit, as % loss or $ per contract. Entering 10 or -10 sets a 10% stop. Your stop loss applies in every exit mode.
Protect open positions. These are optional:
- Move to breakeven after TP1 moves your stop to your entry price once the first target fills.
- Progressive SL management moves your stop up as targets fill. Smart progressive moves it to breakeven after TP1, to TP1 after TP2, and so on. Lock at breakeven moves it to breakeven after a TP you choose and leaves it there.
- Trailing stop follows price up from its highest point.
- Time stop closes the position after a set time.
Step 5: Schedule
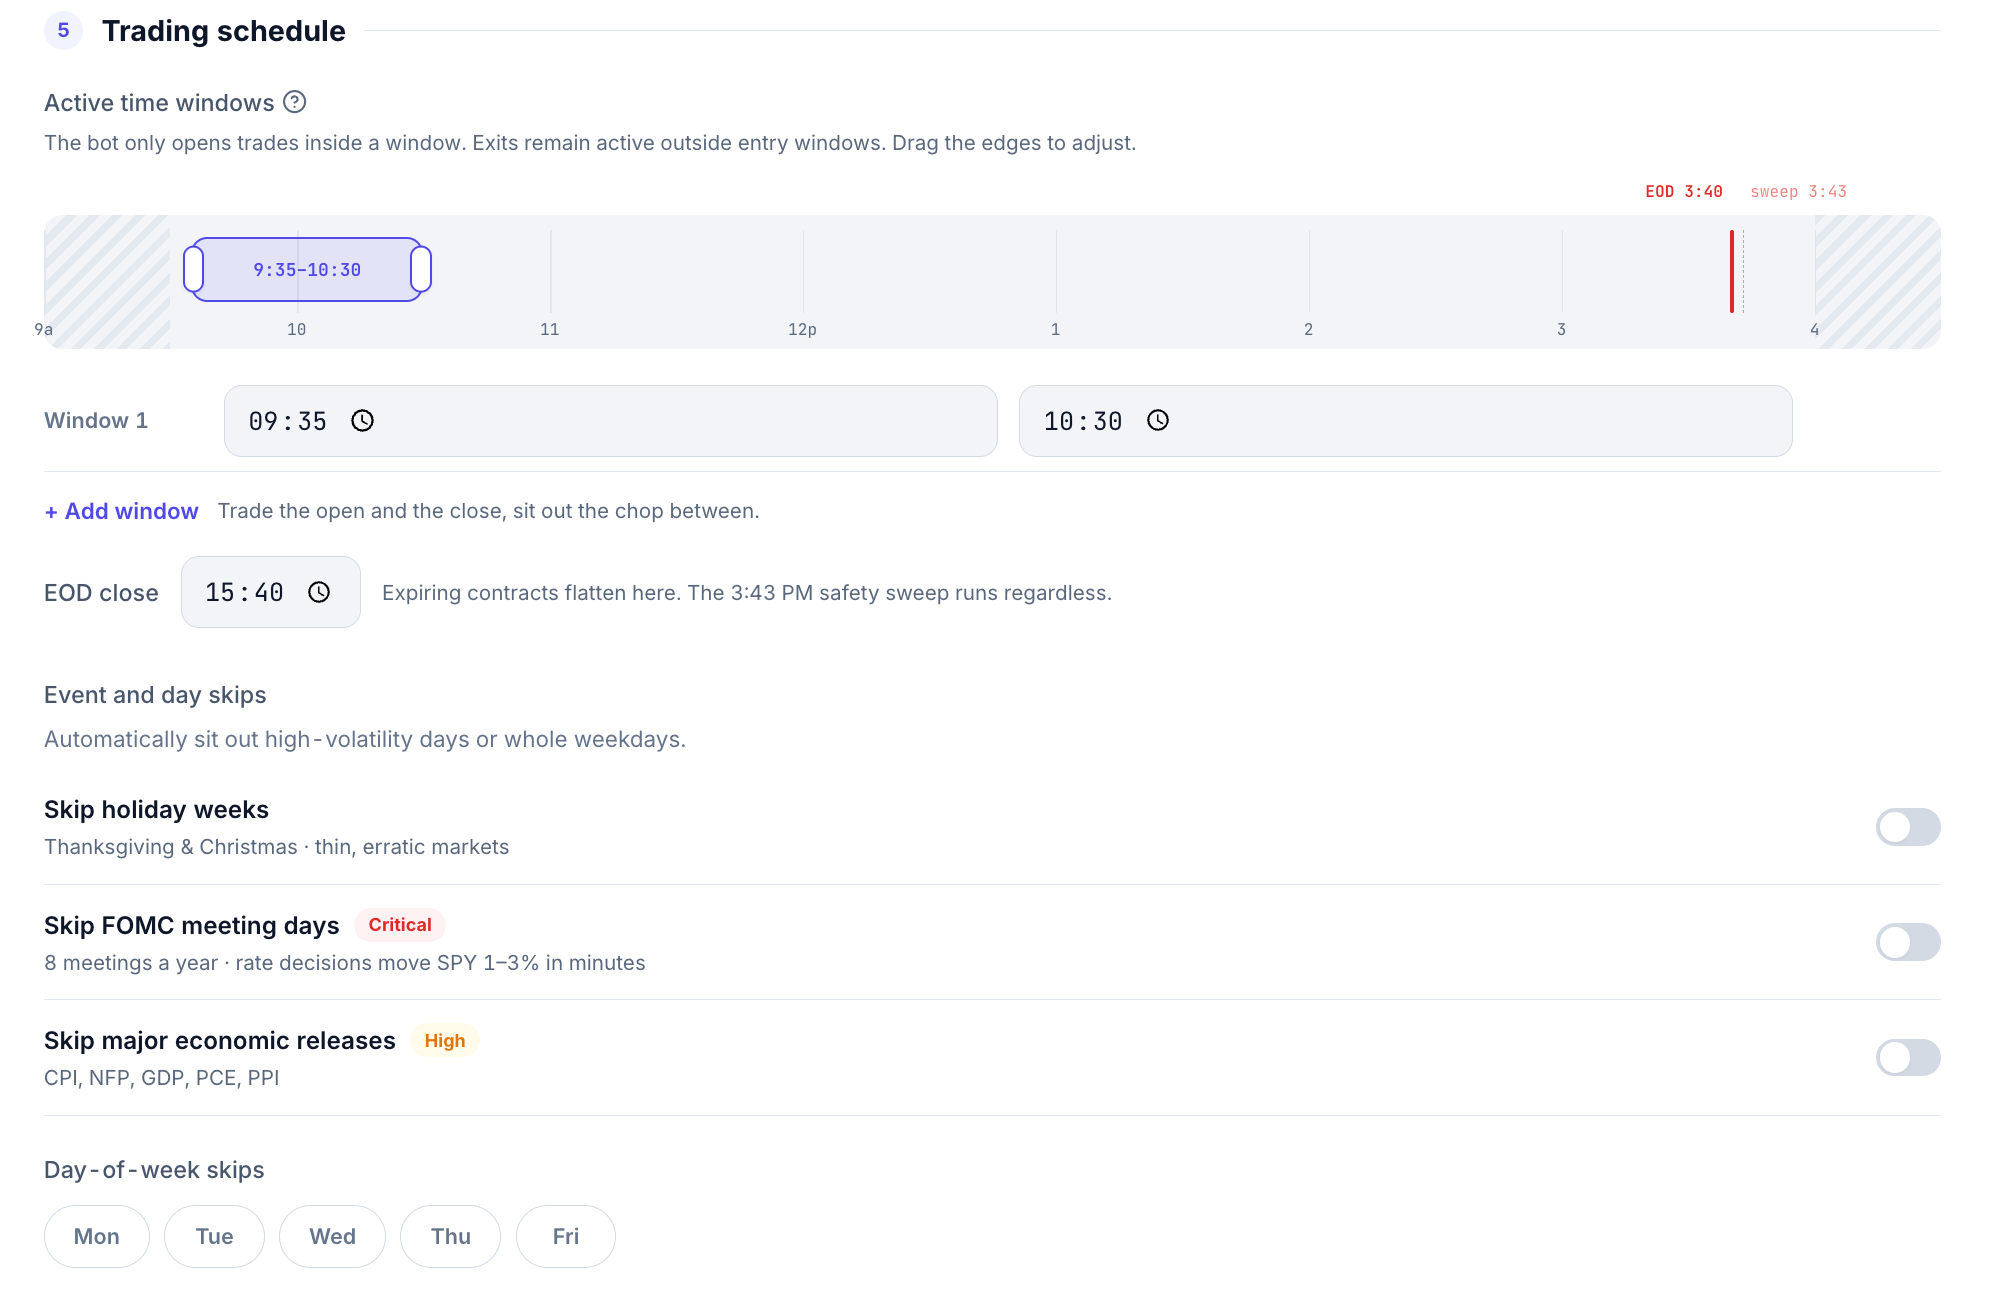
Schedule controls when your bot can open new trades. All times are Eastern Time.
Active time windows. The bot only opens trades inside a window. Exits stay active outside it, so an open position can still close. Drag the window's edges on the timeline or type start and end times. Use + Add window to trade two parts of the day, such as the open and the close, and sit out the middle.
EOD close. Expiring contracts close at the time you set, such as 3:40 PM. A 3:43 PM safety sweep runs regardless. Longer-dated positions aren't affected.
Event and day skips. Keep the bot out of the market on days that tend to move sharply:
- Skip holiday weeks: Thanksgiving and Christmas weeks, when trading is thin.
- Skip FOMC meeting days: the eight Federal Reserve rate decisions each year.
- Skip major economic releases: CPI, NFP, GDP, PCE and PPI days.
- Day-of-week skips: select any weekday the bot shouldn't trade.
Step 6: Risk Management
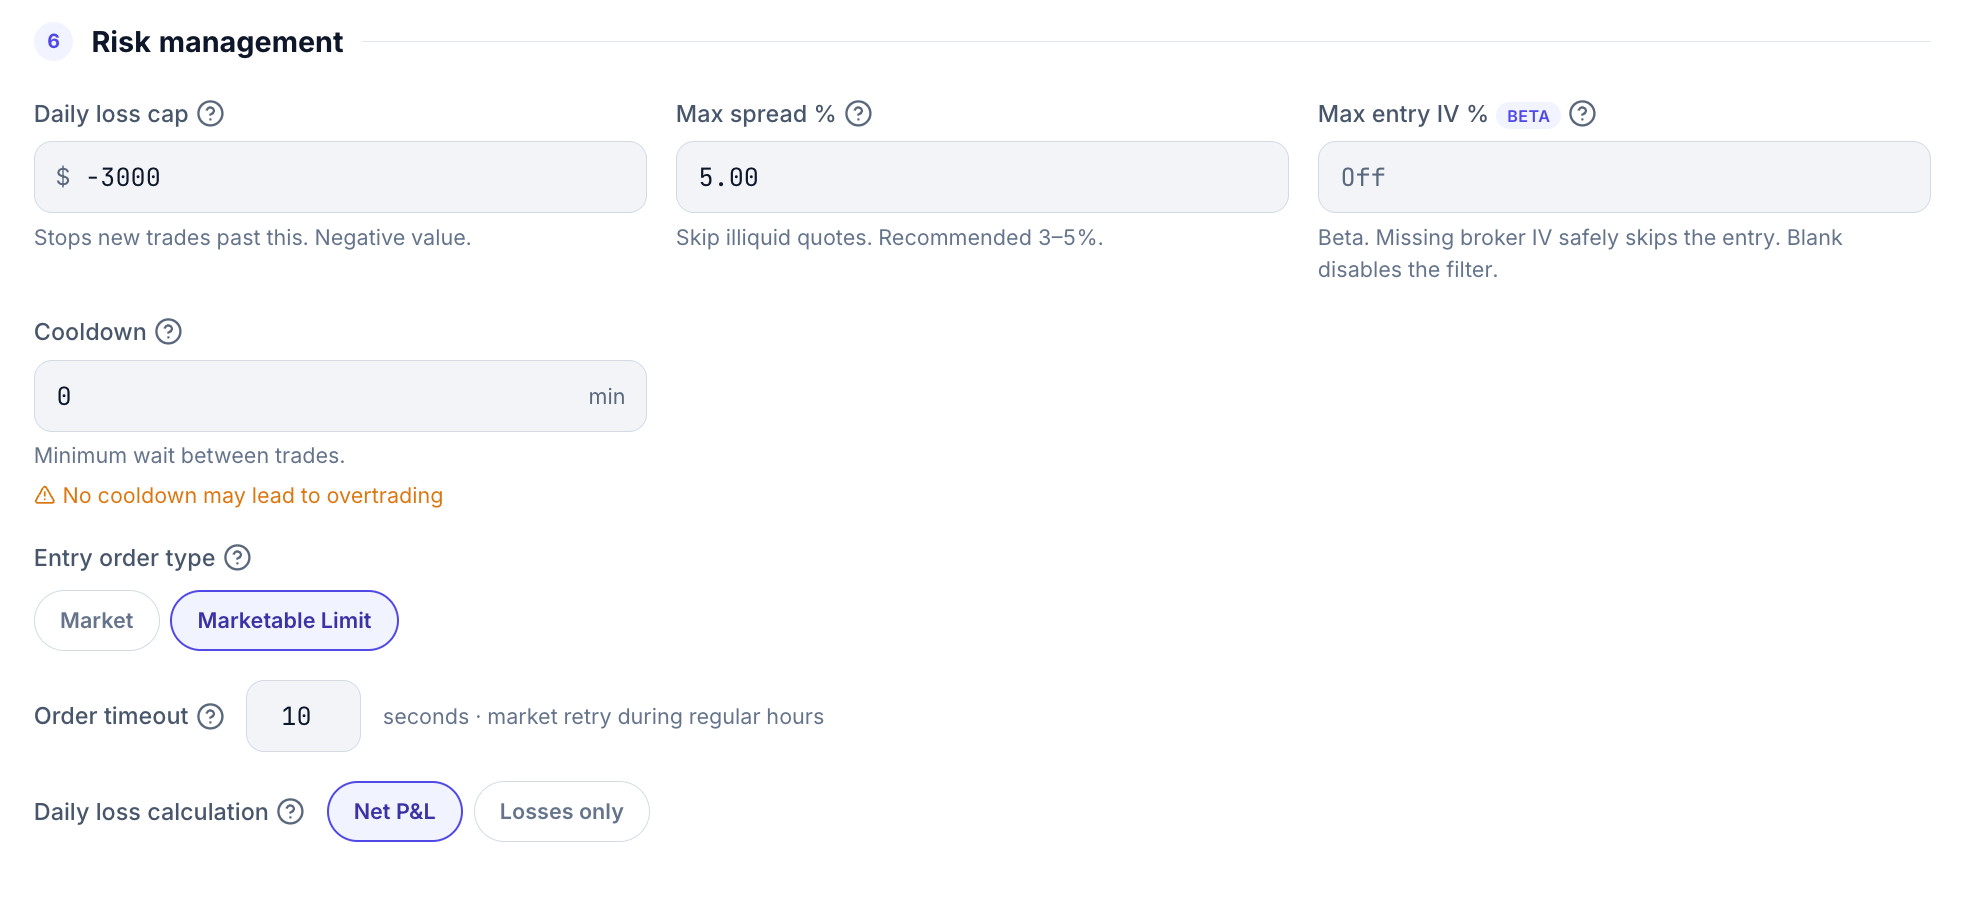
Risk sets the limits every order has to pass, whatever the signal says.
Daily loss cap. The loss at which the bot stops opening new trades for the day, entered as a negative dollar value such as -300. Under Daily loss calculation, choose Net P&L, where wins offset losses, or Losses only, where only losing trades count. When the bot hits the cap, it opens no new trades, open positions keep their exits, and the cap resets at the start of the next trading day.
Max spread %. The bot skips an entry when the bid-ask spread is wider than this percentage, which filters out illiquid quotes. The builder recommends 3 to 5%.
Max entry IV % (beta). The bot skips entries when implied volatility is above the level you set. If your broker doesn't provide IV for a contract, the bot skips that entry. Leave it blank to turn the filter off.
Cooldown. The minimum number of minutes the bot waits between trades. Set it to 0 to turn it off, though the builder warns that no cooldown can lead to overtrading.
Entry order type. Market fills at the current price. Marketable Limit sends a limit order priced to fill right away, while capping the price you pay.
Order timeout. How many seconds an entry waits to fill. During regular market hours, if it hasn't filled by then, RelayDesk retries it as a market order.
Step 7: Review
Review & launch lists your settings for each section: Basics, Strategy, Sizing, Exits, Risk and Schedule. Check the mode, broker and signal in Basics carefully, because those decide where your orders go.
Use the risk profile and checks
The panel on the right updates as you change settings, in every view.
- Risk profile rates the bot and shows Max loss / trade, Max gain / trade and Risk : reward, based on your sizing and exits.
- Checks lists what's ready and what isn't. A red X, such as a missing bot name, must be fixed before you can activate. A warning flags something worth a second look, such as a risk:reward below 1.5 or no cooldown.
- Suggestion offers a fix you can apply in one click, such as Set 5 min cooldown. Suggestions are optional.
Save your bot
Save & activate and Save as draft appear at the top of the builder and at the end of the review.
- Save as draft stores the bot without turning it on, so you can finish it later.
- Save & activate saves the bot and turns it on. It starts acting on its signal inside your trading windows.
Your bot then appears on the Bots page, where you can pause it, edit it or turn it off with the switch in its row. Once it behaves the way you expect in paper, edit it and switch Mode to Live trading with a live broker account.
Was this article helpful?